Category: Blender

I’ve been learning how to use Blender for a while. I will post my progress as I try to make a proper go of getting good.

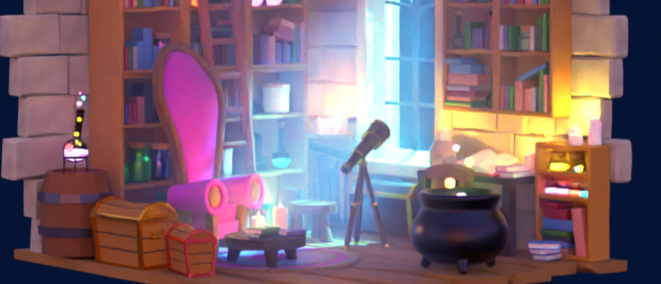
  • Wizard’s workshop

    Wizard’s workshop

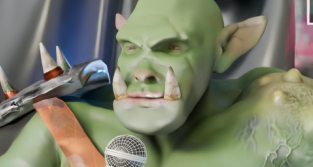
    I’ve been working on this a bit at a time since early July. It’s another course by Grant Abbitt – his Character Creator course gave us Steve the Orc, whose stand-up career hasn’t really taken off.

    I’d done a dungeon build earlier in the year, with Grant, as part of the course that resulted in the two-legged mech, the dinosaur and Bob the Demon. We built walls and a floor then populated the dungeon with barrels, crates and torches. This project is a super-charged version.

    The wizard’s workshop is an introduction to making scenes in Blender. Working with a 3D modelling system there is no issue of getting perspective wrong, but there is a need to get the proportions right in a scene. Your shelves and furniture, books, candles and other oddments need to be the correct size otherwise the scene won’t work.

    Finished workshop with comfy chair, lots of books, bubbling cauldron, mysterious liquids and a pet skull on the reading table.

    I learned quite a few useful things during the course. Modelling glass and filling it with different coloured liquids, how to randomly assign colours to similar things (the books), and creating an atmosphere in a room using mist and moonlight.

    Away from the bright colours of the final render there’s a lot of fiddly bits that will allow me to move stuff around if I get the urge. Each group of books is linked to a single ’empty’ so I can move and position several books at a time. It’s how I got the pile of books next to the cauldron. I could also animate flying books or potion bottles – it’s a wizard’s room, after all!

    Random colours for each item help to see what items are where without the computer lag associated with full render. You can also see a lot of little arrows – those help move and align multiple items

    So finally I did an animation where the camera goes round in a circle while focussing on one item. This helps you to see more of the items in the scene.
  • Blender – Dolly zoom!

    Blender – Dolly zoom!

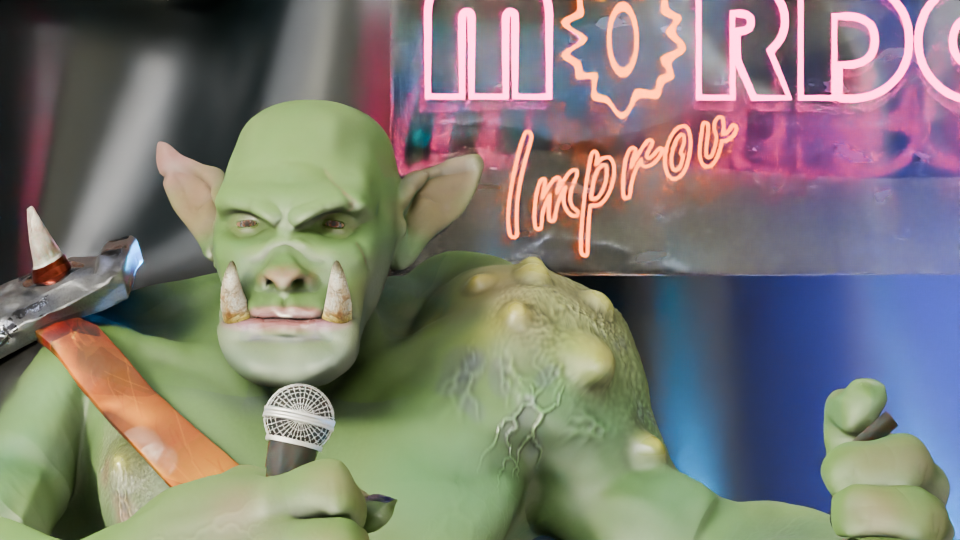
    The return of Steve the orc…

    Playing around with what the camera can do in Blender, I was inspired to try and set up a dolly zoom. It turned out to be quite easy.

    What’s a dolly zoom?

    It’s an effect you’ll have seen but perhaps not known the name of. I think the most famous example is from Jaws, when Chief Brody sees the shark attack off the coast and the camera seems to both zoom in on him and yet he stays the same size onscreen.

    It’s a matter of doing two things at the same time. You change the focal length of the camera from wide to close and you also physically move the camera away from the main subject. To do this with a physical camera you need to have the camera mounted on a track (or dolly) and change the focal length to zoom in on the subject. Hence, it’s a dolly zoom.

    In real cinema this would need at least three people, perhaps four. The camera operator and the focus puller would be on the camera mount, and one or two big chaps (the dolly grips) would move the camera and coordinate with the focus puller and the director to get the smooth effect the director wants.

    For computer generated animation, it’s all a lot easier. You decide where you start from, add an animation keyframe once you have the scene how you want. Keyframe camera position and focal length. Then set the next keyframe for the end of the effect, reposition the camera and set the focal length so that the main subject is the same size as before. Set the keyframes and play the animation.

    Writing it down makes it seem a lot more complex than it is.

    If you’ve not got it quite right, it’s a quick job to change the timing, camera position or focal length. Much easier than doing it for real.

    Let’s give it a go

    To test the idea I set up a simple scene. Three blocks to represent the main subject and two things a bit further back and a white picket fence to the back of the three blocks. The ground is a slightly uneven plane with a sand colour and the sky is an image I got from Poliigon.

    To get an idea of how this looks when you’re in Blender, I learned how to do a screen record (I used ShareX for this) and set up a top-down view of the scene.

    Then I tried it on Steve the orc doing his failing stand-up. Steve has just realised the next five minutes is all dwarf jokes and a deputation from Khazad-dûm has just walked in.

    This type of dolly zoom is used to give an unsettling feeling to the scene. In the Apple TV series Severance it is used to indicate the change between ‘outer’ and ‘inner’ personalities.

  • Wall break demo

    Wall break demo

    I used the ‘cell fracture’ add-on to break up the anvil in a previous video. The video below pulls back a bit from the set-up I used for the second part of the inflation (the popping of the anvil) so you can see that the pink anvil starts breaking up immediately and falls to the floor before changing back to the metallic texture.

    The grassy scene behind the polka dot ‘studio’ is a HDRI (High Dynamic Range Image) and it’s used to give ambient light to a scene.

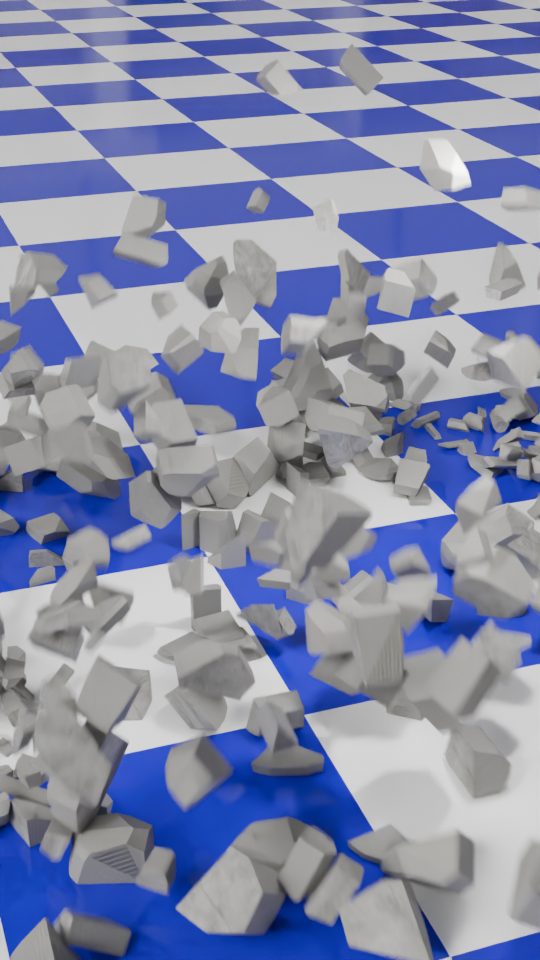
    I thought it would be a good idea to make a demo video to show how the number of cells you break something into affects how the demolition looks.

    To make this, I first set up a concrete wall and a nice, shiny checked floor. I also made a rusty metal ball to act as the object that smashes the wall and set up the camera to get a good view of the full event. This would be the basis for the six animations that make up the final video.

    For each of the animations I changed the number of pieces that the wall would be broken into. This is the essence of the video, and was simply a matter redoing the wall break-up (takes a few seconds) and then rendering the animation (about 10 minutes for each part).

    This is how the wall looks when it’s been broken up into 100 cells. When the ball hits the app calculates where the bits will flu out to. Then it’s up to me to add sounds.

    I then used the Blender video editor to make one video from the six separate animation. Once that was done, I had to find out how to add text to a video. It turned out that is was easy enough using the Blender video editor, you need to set the font and position of the text and use visual editing to set when the text appears. All of this was fairly intuitive now that I’ve used the editor for a while.

    The most complex part was the audio. What I wanted was a series of crashes that conveyed how the size of the particles decreased but the number increased. After a bit of searching I found a two-minute audio of a wall being demolished by a wrecking ball. Some parts were louder and sounded more like a wall being smashed to pieces, others were more like a few pieces being knocked from a wall. I just needed to cut bits out and, for some of the parts, layer up the audio so that there was more noise of crashing concrete because there were more pieces being generated.

    I also put the full audio in the background, to make it sound like an ongoing process at a building site.

    The very last thing I had to do was make sure the video would show as a ‘short’ on YouTube. I uploaded the video that was generated by the Blender Video Editor, but that was categorised as a normal video. So I used Canva to force the video into a ‘Short’ format using a template and that edited video is now on YouTube as a ‘short’.

  • Inflating anvil – part 2!

    Inflating anvil – part 2!

    Changing up a video I made a few months ago. The inflating anvil was a fun little thing I did in June, an anvil inflating and floating out of shot.

    I made two changes to the initial inflation stage. First, I changed the background to polka dots and second I added a shading change so that the anvil turned from a metal anvil to a plastic balloon.

    The easiest way to add the popping was to make another animation using the same background and camera setup, do the break-up and fall as a separate animation and edit the videos together when I added the sound effects.

    The initial break-up after the ‘pop’ happens off camera. There’s an add-on available in Blender that lets you break up an object into random chunks. This is great for breaking walls, smashing up objects or popping inflatable anvils.

    Using the visual video and sound editor in Blender, it was easy enough to edit the two videos together. Three sound effects were used. Inflating balloon and balloon pop were both from Pixabay. The clattering is from the BBC sound archives – all of the metal falling sounds on Pixabay were too hollow, they sounded like coins or cans and I wanted a heavy metal sound.

    What I also had to do – and forgot originally – is reset the aspect ratio to square so that YouTube sees this as a ‘Short’ rather than a full video. Shorts get promoted in the YouTube algorithm in a different way and it’s a lot easier for people to see them. This has the unfortunate side effect that the video looks a bit odd here in the blog.

  • What’s yellow and dangerous?

    What’s yellow and dangerous?

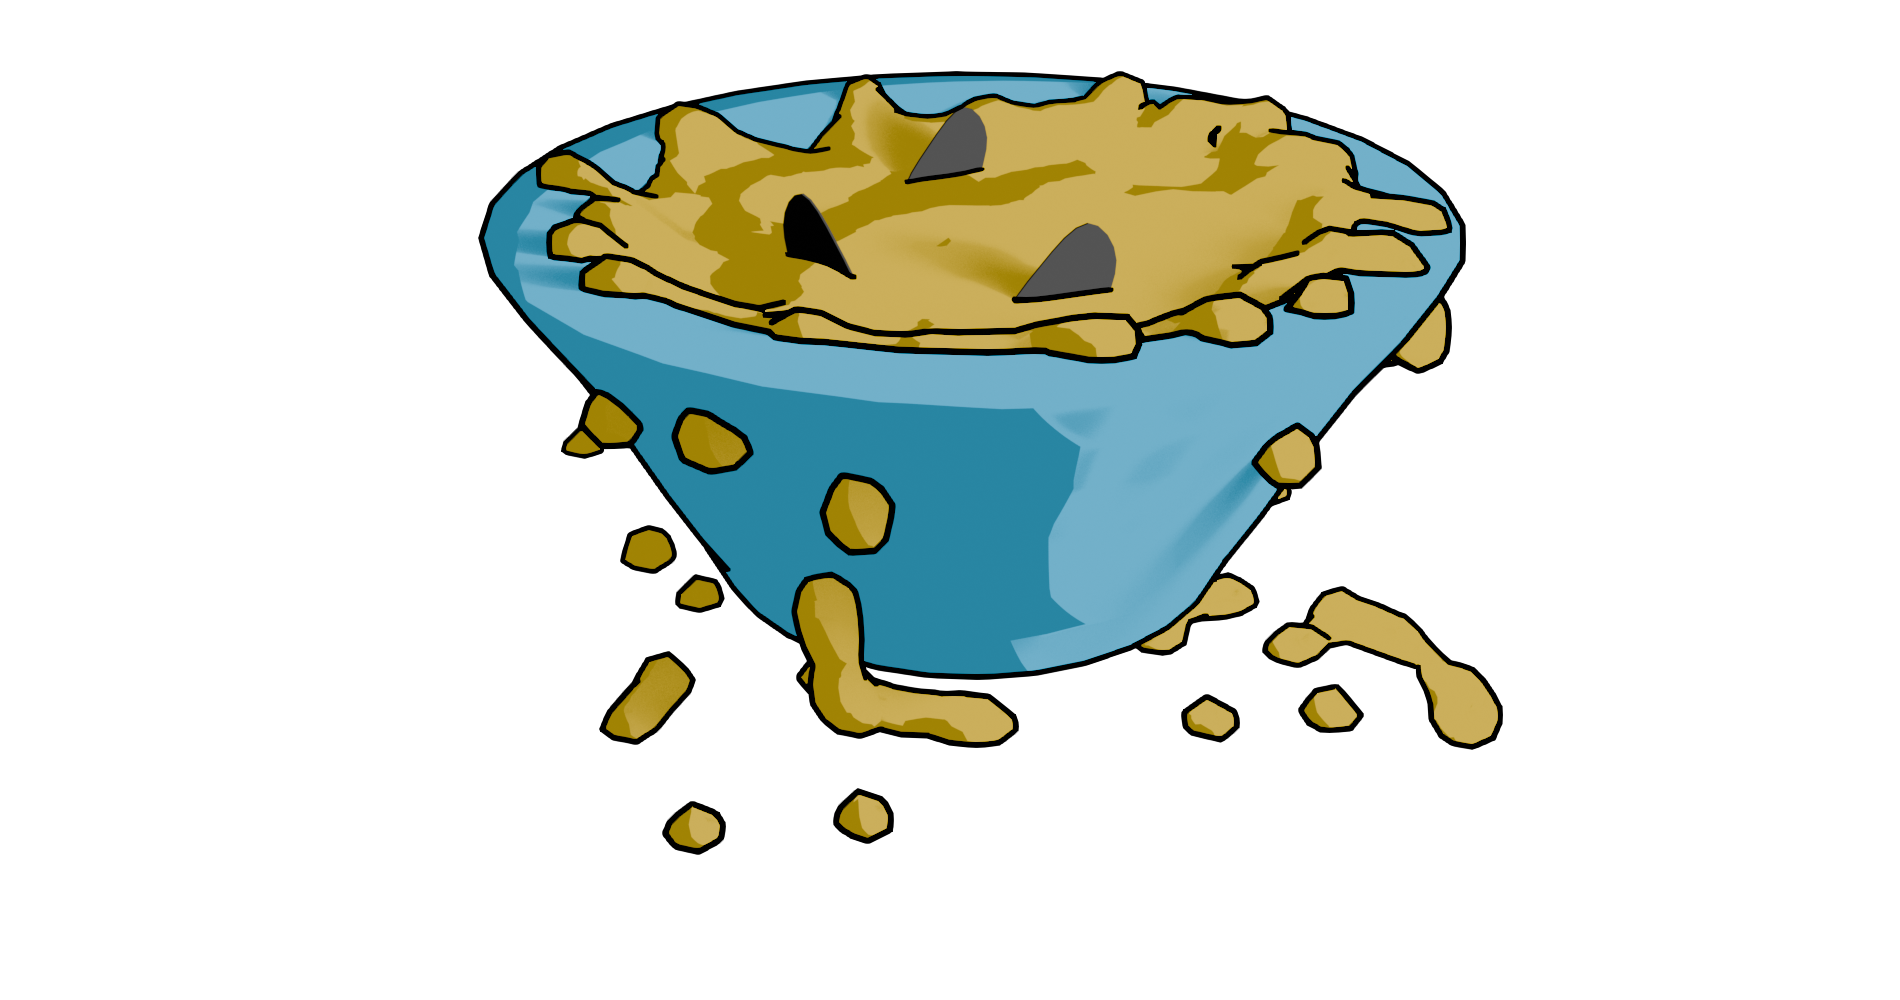
    Shark-infested custard!

    It’s an old joke, but also a bad joke. It’s old enough to be the subject of a new design to go on the RedBubble shop.

    Finished design. Lumpy yellow custard in a blue bowl with three shark fins poking out.

    Blender fluids

    To make a bowl of custard with sharks in it, I used Blender. There was no other choice, apart from drawing it from scratch. This meant three things. One, model a bowl. Two, add fluid – viscous custard. Three, add shark fins.

    Simulating a viscous fluid in a bowl is theoretically easy. Making a bowl was quick enough to do with the experience I’ve built up over the last few months. I took a cylinder, fiddled with that and made a fairly crude bowl. I did a version that was more conventionally bowl-shaped, but Mrs S preferred the straight sided version.

    When using fluids you have to define the space where fluids can be simulated, a source for the fluid, and what objects interact with the fluid.

    The simplest thing in fluids is to have a sphere that lets liquid out constantly into a volume. It’s not very exciting, but it’s a start.

    Fluid simulation in Blender. Make a sphere, add fluid domain (the volume where the fluid will be simulated – not visible here), then press start on the animation and you get liquid flowing. Change colour as required.

    Then you can add a vessel or other object that the fluid can interact with and overflow. You also have the option- which I used for this – of making a given volume of liquid and only generating that. I used this to make a sphere of custard that flopped into the bowl. I could adjust the volume of the sphere so that the bowl filled, but didn’t overfill.

    Shading was next. Yellow is the obvious colour for custard and a blue bowl contrasts well with that. I think a cartoon style works well for this type of product design. It reduces the number of colours in the design and also allows a for a bold appearance. To get the fins, I just added some planes and adjusted to make into fin shapes.

    After that, I ran the animation to the point where I liked the look of the piece and rendered just that frame. I rendered this with a transparent background so that the design would look good on products and also allowed me to export to Canva to add text.

    Sharks in custard
    Not the design that I went with, but close enough. There is too much custard (or not enough bowl) in this one.

    I’ve mainly used Canva for the promotional videos I make for Facebook and for some t-shirt designs. Here I added text in Hellprint font with a brown outline and was able to curve the text to a circle. This was easier than the method I used for the chilli and caffeine designs, but there is less control.

    Finished design. Lumpy yellow custard in a blue bowl with three shark fins poking out.

    Because I’m using RedBubble rather than Etsy, I can offer the design on a variety of things. I think this one works best as a sticker or fridge magnet, but it doesn’t cost me any extra to make it available on t-shirts and other clothes.

    Let me know if you have any favourite old and bad jokes that you would like to see immortalised in cartoon form.

    A selection of the products available with the ‘Shark infested custard’ design. I think the sticker works best, though I like the badge too.

  • Spinning doughnuts and brollies!

    Spinning doughnuts and brollies!

    Now that I’ve learned how to add music to my videos, I can fill my Drew Ackermann channel with mediation-type videos with looped animation and relaxing music.

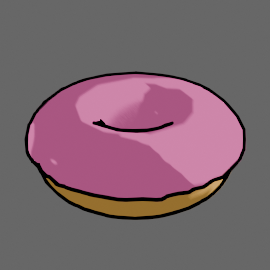
    For this one I used the Falling Rings video as the basis and replaced the rings with a doughnut. There was a slight issue with the tumbling effect because the original rings turned 180 degrees through the animation sequence. This looked OK because they had horizontal symmetry. The doughnuts don’t, the icing meant that the doughnuts would spin 180 degrees then suddenly shift to the original orientation. Once I realised that this was happening it was fairly easy to fix. It was slow because the doughnuts have a lot more faces than the rings so it took longer to render each time I wanted to change anything.

    Cartoon doughnut! There are a few tutorials about making a doughnut in Blender, some of them also add sprinkles but I thought that would be too much detail for the type of video I planned to do.

    There’s a similar video of tumbling brollies that I’ve put up as well. This one uses three different brollies. I designed the brollies all by myself!

    Three different brollies for the tumbling animation. Not sure how much detail is needed for the animation, but they certainly look brolly-ish.

    I really think Blender is like a language, you don’t understand a lot of what is going on for the first years but you can quickly make up your own sentences.

    I may set up another channel of unsettling animations, because people like all sorts of things. A cycled tune in a disturbing key accompanied by melted figures falling into a fire. That sort of nonsense.

  • Morphing animation in Blender

    Morphing animation in Blender

    While I looking at ways to morph objects to create soothing animations, I came across a way to make a less-soothing, but still fun, way of morphing any two objects.

    For the base models I’ve used some resource that are in an ‘add-on’ in Blender. Not sure why I chose a banana and a monster truck, you’ll have to ask my brain about that and it’s not talking to me.

    Once you have the two models there’s some animation to be added to make the objects spin. The changeover happens at maximum spin speed at which point the banana becomes invisible and the truck appears.

    This is how the truck and banana look without any rendering. The floor and wall are also just grey objects waiting to be coloured in.

    Once I’d done that, I realised I’d set the banana quite high above the floor, so I animated the truck falling and bouncing.

    Setting the scene was next. I thought it would be nice to have it look like the morph was happening in a car showroom. I made a chequered floor1 and a wall at the back with windows. Getting the window glass to look convincing needed a bit of fiddling around with various settings, but in the end I got it so you can see through the windows to the scenery behind. A couple of blue-tinted backlights add an extra dimension to the objects.

    Once the animation had been rendered, I used the video editing suite to add two sound effects that I downloaded from Pixabay, where I also got music for the ambient videos. The swoosh and the thump could be positioned in time to get them synced with the animation. This is one of those things that’s easy when you know how, but I had a hell of a job finding how to even start video editing.

    Screenshot of a video and audio editing screen.
    Video editor in Blender. The videos and the sound effects can be moved and cued up to happen at the right time. It’s a click and drag system, so pretty easy to use.

    So the ‘swoosh’ in Channel 2 reaches its peak as the banana speeds up and there’s a ‘thump’ in Channel3 timed to coincide with the truck hitting the floor. I did search for a sound effect of a monster truck hitting a tiled floor, but couldn’t find one. Surprisingly.

    1. This is one of the many presets for the Shader editor in Blender, so easy when you know what to look for. ↩︎
  • Ambient videos

    Ambient videos

    Ambient YouTube videos, under a pseudonym for now. I may link further to ‘how-to’ videos once I work out how to do a ‘how to’ video.

    I need a ‘how to do how to do’ video, then.

    Mrs S suggested that I change the rings to doughnuts, though this would be less relaxing IMHO.

  • Koffein -Redbubble

    Koffein -Redbubble

    Having done a design with caffeine, I thought I’d go multilingual with a German-language version of the design.

    This is on RedBubble, so it is available on a wide range of items.

    Cartoon of a caffeine molecule with the word 'Koffein' underneath.
    The German language version of the Caffeine design. There’s some tweaks to the lighting and a change in font, but the aesthetic is the same.

    As discussed in the previous post, this uses Bauhaus, a slightly different font to Berliner that I used in the English language version. I’ve kept the same aesthetic as before, I like the ligne clair look of the cartoon and the ball and stick molecular model is a design classic that has served chemists for decades.

    The ball and stick model was first used by August Wilhelm von Hofmann in 1865, so this year is the 160th anniversary of the ball and stick model. Hofmann’s is a name familiar to all organic chemists, with several organic reactions named after him as well as a device for electrolysing water.

  • Blender part 12 – Steve’s back again!

    Blender part 12 – Steve’s back again!

    So I fixed his fingers somewhat – still not perfect, I can’t get a good fist, but the fingers no longer twist in an awkward way.

    Orc's hand, gripping with straight fingers.
    After a bit of fiddling around, I got Steve’s hand to look a lot better. The fingers are straight, at least.

    Stand-up comedian

    As mentioned in a previous post, I’m a fan of comedy. Also, I’m a fan of Stewart Lee1. To my mind, he elevates stand-up to an art form2 and is also hilarious. To Mrs S he just drones on about stuff3. Anyway, I have a picture of the man in full flow.

    Stewart Lee in action.

    This photo was the inspiration for Steve’s new job as a stand-up comedian. But to make it more obvious that Steve is in a comedy club, rather than giving a lecture (on the use of Lammas bread in recipes for hobbit), I thought it was necessary to add comedy club trappings. This means a curtain and lights such as Stew has and a neon sign so we know he’s in a comedy club. And a microphone, mike stand and a suitable pose.

    Aisling Bea wearing an orange hat under a neon sign reading 'Camden Comedy Club'.
    The sort of thing I was thinking of for the Mordor Improv stage. Sadly, Aisling Bea was not available for comment.

    The mike stand was the easiest part. A cylinder for the upright and another, cut in half lengthways, for the clip.

    The microphone was also fairly simple. I decided to just show the top of Steve’s hand, so I didn’t need to model the flex, mainly because the right arm looks a bit weird when it’s bent. So a cylinder, tapered a bit, a sphere as the inner part of the microphone and another sphere given a wireframe look as the input bit. And a flat cylinder as the metal ring around the bit you speak into4.

    Posing Steve wasn’t too hard since I’d done a bit of this already. Getting the hands to look reasonably realistic depended on getting the curl of the fingers right, which I had done already.

    Now I just needed to set the scene.

    Blender can add physics to an object, and the physics I needed for the curtain is the Cloth Modifier. Using this, an otherwise flat object can be made to act like cotton, silk, leather whatever you like. You can drop it, drape it or pin it in place to react to gravity and other forces.

    Cloth can be pinned in place to drape. You can also change how many faces are in the cloth. From left to right, there are 400, 4000 and 50000 faces. More faces means more drapable cloth.

    For this, I followed a tutorial to make a curtain which would hang behind Steve. And I decided that the Mordor Improv is a slightly down-at-heel establishment, so the curtain is drooping a bit.

    More interesting is the neon sign behind Steve. I had to go through a couple of tutorials to get from ‘I have this idea’ to ‘I can do this now’. Two fonts are in this – Bauhaus (Mordor) and Freestyle Script (Improv). The Eye of Sauron was originally the O of Mordor, pulled around a bit and given a different colour to look more evil eye-like.

    Curtain, original neon work, added plastic backing and as the sign appears in the final render after some bashing around.

    So now Steve has a job. He’s struggling to keep Sauron’s minions entertained at the Mordor Improv.

    Orc part way through a comedy routine. He's holding a mike, standing in front of a neon sign saying 'Mordor Improv'.
    “Two hobbits walk into a bar. Must have been a low bar.”

    If you have any Middle Earth jokes, let me know!

    1. Some would say the two are mutually exclusive. Mrs S, for one. ↩︎
    2. Strokey beard moment. ↩︎
    3. She’s right. But it’s the way he does it. ↩︎
    4. Sorry to get all technical with you, there. ↩︎
Verified by MonsterInsights