The other day I reached a Duolingo rating of 80. This means that, after about five years of concentrating on German, I’ve finished the course.
From now on there’s a series of daily refresher lessons so I don’t get rusty. And I’m still talking in German with our younger daughter as she completes her A level. And after all that learning I still cannot remember which ‘the’ to use or when I should use ‘ihn’ and ‘euch’. Clearly, a different type of tuition is needed if I am to go further.
What next? I could revisit Danish, but no I no longer work for an Anglo-Danish company I don’t know if I want to. Or French would make sense since we go to France quite often. Or maybe Scots Gaelic – I grew up hearing this on telly occasionally1, though Thurso wasn’t in the Gàidhealtachd and I have nobody to practice with. I’ll decide soon.
Grampian (north Scotland independent telly) would have a few hours of gaelic programming including the children’s programme ‘Cuir Car’ which showed life in the Islands and songs by Runrig. ↩︎
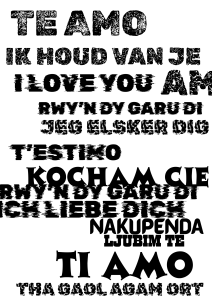
French is supposedly the language of love. Certainly to the ears of someone who grew up only hearing English and the occasional Scots Gaelic, the words “Je t’aime” sound more pleasing than “Ich liebe dich”. But to German ears, what does “I love you” sound like? Do they prefer “Te Amo” or would the Dutch “Ik houd van je” sound exotic?
Background text for the design. Fourteen languages, mainly European because I couldn’t work out how to get other alphabets.
This design was done in Canva. I only made it a week ago and I have forgotten which languages I used. I think there’s German, Spanish, Dutch, Danish, Welsh, Scots Gaelic, Swahili and Polish. Oh, and English (thanks to Mrs S for reminding me about that one!).
To make the final design I repeated the background text at random angles and set the opacity down. Then a nice pink gradient as background and it was ready for the main image.
The main text was done in TC Milo, black with a light pink outline. The massive kiss is one of the graphics that Canva supplies.
Summary of fonts used for this design.
This design looked better on some items than on others. I only did one item of clothing, the black sleeved t-shirt. And the apron, if that counts as clothing. Buttons below link to the products.
The “je t’aime” design on tote bag, t shirt, clock and apron.
Also known as ‘chips’ in the US and Australia1, crisps are my go to snack.
Will Self is a fan. In his typical sesquipedalian style he has written about the ‘plangent crepitation’ experienced while consuming these ‘fried and friable foderols’. Basically, it’s the crunchiness that gets you. There’s little more disappointing in this world than a non-crunchy crisp.
What flavour? I’d rank the standard flavours as salt & vinegar > ready salted > cheese and onion.
Favourite S&V is Piper’s, a different flavour of vinegar. They claim it’s cider vinegar but whatever it actually is, there’s something a bit more mellow about these than the standard sodium acetate in some crisps.
Pipers cider vinegar and salt crisps. Emphasising the vinegar first suggests that the vinegar is at the forefront of the flavour, and they are right.
Ready salted is the vanilla ice cream of the crisp world. Maybe not very exciting, but a crisp manufacturer has to be able to do this right. The crunch, the salt and the fat are a delightful combination that can also be experienced in good pork crackling, but without having to prep a pork roast first.
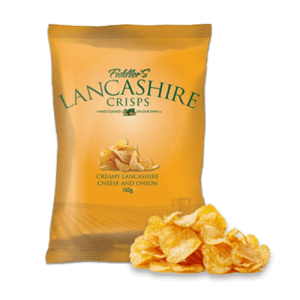
So while I’d normally put cheese and onion as third after ready salted, the exception is Fiddler’s Lancashire Cheese and Onion. These are currently my favourite crisps, though they are difficult to get hold of. Mrs S surprised me last Father’s Day with a whole box of them, much to our mutual delight. Hers in finally finding something I want2, mine in having 24 bags of these fantastic crisps all to myself.
Current favourite crisps, Fiddler’s Lancashire cheese and onion. Distinct flavour compared with other cheese and onion, Lancashire rather than ‘cheese’ makes all the difference.
Many other flavours are available from Piper’s, Fiddlers, Kettle Chips and others. Mrs S is a fan of Fiddler’s black pudding and mustard. Black pepper is a great addition to any crisp. Pigs in blankets and chorizo get shout outs from some manufacturers. But for me, the ‘big three’ flavours from my childhood will likely never be supplanted.
Where what we call chips are known as ‘hot chips’. The colonials are so disappointing ↩︎
Whenever a scientist retires, resigns, is made redundant in their mid-50s, or leaves science for any reason there is a great deal of knowledge, know-how and wisdom lost.
I’m proposing an institute where these people are paid to come in a few days a month and thrash out their old theories for the benefit of younger scientists and engineers. There will be access to equipment, testing rigs and all sorts of analytical equipment, with free tea, coffee and biscuits. The full-time junior staff will be specially selected for their intelligence and patience.
One of my theories about innovation is that there are many half-notions in the world, but connecting your half to someone else’s half and making that bridge the gap between problem and solution can be a hit-and-miss affair. If you’ve ever heard something at random that sparks a memory and makes you go “Ah!” then you’ve bridged that gap.
Comedy writers are excellent at this, a joke is two ideas put together in an unexpected way.
The SIMOF solution is to have people who spent a lifetime bridging gaps create sparks in ways that nobody – least of all themselves – could anticipate.
It needs funding, and a site that has good access for public transport. Other than that, the idea’s good to go.
Describe an item you were incredibly attached to as a youth. What became of it?
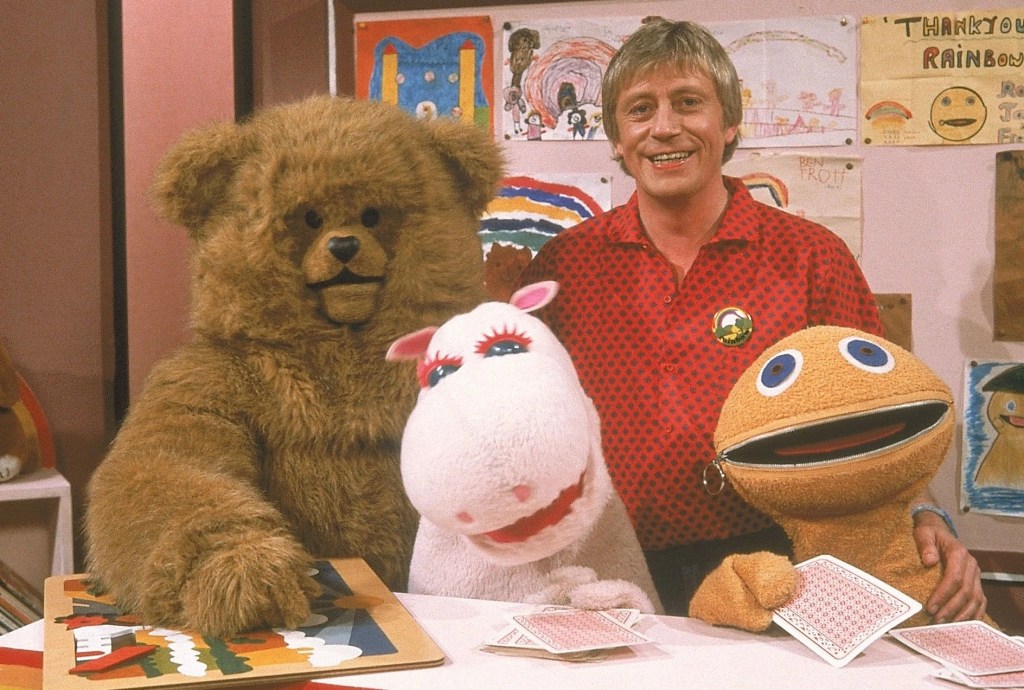
When I was very young I had a teddy bear. Not unique, I know. Mine was a hard-bodied bear that I called ‘Bungle’, after the bear in Rainbow. I have no idea where he came from or who gave him to me.
Bungle could growl. Hidden inside the body was a device that gave out a ‘Ba-aaa’ sound when you turned him upside down. He wasn’t very cuddly, I may have had other toys to cuddle, but Bungle is the one I remember.
My memory of him is that he lost an eye at some point and also at least two limbs. He got threadbare and likely very grumpy towards the end. I have no idea what happened to him, he probably got thrown out when we moved from Thurso when I was twelve.
In the living room of that house there was a big toy box that also served as a window seat. From there we could glimpse the island of Hoy, one of the Orkney Islands. In the box was everything you could wish for to play with. A couple of dozen cars and car tracks, loads of Lego, soft toys, Bungle, some Fisher Technik, wooden building blocks and a tired old red plastic ride-on train.
I think the box itself was thrown out with the move, but some of the toys are still around. The Lego, my wooden blocks – a present from my ‘new little sister’ in 1973 – and the train are still at my mum’s house and are enjoyed by her grandchildren and great grandchildren.
Bungle is long gone. Other toys have been lost over the years, but I do love that generations of our family have enjoyed toys we outgrew, but our parents kept hold of, just in case.
I’ve been doing a course on visual effects, covering explosions and jet fighters flying over water. The essential part of making explosions is breaking up an object and then animating the collapse. This is what I did in my wall break-up video. Build a wall, break it into pieces and then throw something at it to break it up.
Building collapse with loads of dust. No sound on this, that’s why you can’t hear anything.
For the building collapse there were a few layers of simulation that needed to be done – the building itself, the windows and the dust. To save computer time the collapse of the building was done first and then the other simulations added. The walls of the building are made up of over 800 pieces, each of which is simulated to fall when a ball (which isn’t shown in the final animation) hits the bottom of the structure. That’s quite a lot of computing power. Then add the hundreds of bits of the windows and the dust, and that’s likely enough to crash most computers. So the simulation is done in parts.
First the building collapse is simulated using rigid body physics. Once you’re happy with how the collapse looks, you can use the function ‘bake to keyframes’. The physics is removed and the motion of each part is animated.
This means that there is less demand on the computer. You can then add a separate physics simulation – for the building collapse the windows were done separately and also baked to keyframes.
Baking to keyframes also means that animation itself can be adjusted. One simple thing is to drag the keyframes for the explosion and create the illusion that the explosion has been frozen in time.
All this sparked a memory from many years ago when The Matrix introduced live action ‘bullet time’, the illusion where time seemed to slow or stop while the camera turned around the subject. The way they did this was to use an array of 120 (or more) 35 mm cameras around the actor and trigger the cameras in quick sequence at the required time.
This is one of the setups they used in The Matrix. As the actor jumped or fell backwards the cameras were triggered to capture the motion and then the images cut together to make the bullet time effect.
Then the images were spliced together to make a few seconds of film. This harks back to the very earliest motion photography experiments of Eadweard Muybridge1, but with an extra twist.
Could I do this sort of thing in Blender? Well, yes, otherwise I wouldn’t be posting this blog. I’d already figured out how to do a dolly zoom in Blender, so bullet time would be another interesting camera effect to work out.
First I made a simple wall break animation. I say ‘simple’, I would have struggled with this a year ago. You make a wall by resizing the default cube. Then add loop cuts to increase the number of faces and vertices for the next step, which is the cell fracture. Add rigid body physics to the pieces and you can simulate a ball smashing into the wall. Once that’s done the bake to keyframes is done.
Stretching out the keyframes was simple enough. I spread a few keyframes over two seconds of animation time so that the bits of the wall and the ball didn’t stop flying, but rather slowed right down.
Then I added an ’empty’ to the scene half way up the wall. I parented the camera to this, so that I could animate the empty and the camera would follow the empty’s motion. I’d done this in the wizard’s workshop as an alternative to the follow path. Follow path gave a better result for the workshop; for this it was easier to use a rotating empty.
The camera would stay in one place until just after the ball smashes through the wall. Then, during the slow motion the camera pans around and then stops as the action starts up again.
Once all that was sorted, I added some background details – wallpaper and a skirting board to look like a home. And some sound effects, too. I couldn’t find exactly what they used when Carrie-Anne Moss jumped up and kicked the policeman, so I got something weird from Pixabay, the site I usually use.
Final bullet time video. This one does have sound.
I’m taking ‘college’ to mean ‘university’, since I have only been to one college – a 6th form college (16-18 years old) where I did my A levels.
In my time I have got degrees from four universities and a diploma from a fifth.
I did my first degree (Chemistry) at Loughborough University, a mid-range university and high-level pronunciation test for non-natives. This is the most important college/ university because that’s where I met Mrs S.
After Loughborough I worked at Liverpool University, where I also studied part-time to get a Masters in geosciences. I learned how to use Excel (version 5.1) to model isotope fractionation in carbonate minerals.
My next job was at Bath University, still a low-level lab tech. After a couple of years there I was offered the chance to do a PhD. Since my career was otherwise stalled (departmental politics) I said ‘yes’. I finished my study of the surface chemistry of pharmaceutical cellulose excipients in 2002, graduating in 2003. More importantly, Mrs S and I got married during my studies.
2003 was also the year we moved to Australia and in 2004 we became parents. In 2005 we moved back to the UK, where I started work for the company I would be with for 19 years before being laid off in late 2024.
During that time I did another part-time masters (I’d intended doing a Diploma, but the course was pretty interesting and useful). This one was run by De Montfort University in Leicester, on Quality by Design in the Pharmaceutical Industry. I also found time to do a Diploma in Innovation at the Saïd Business School (Oxford)in early 2024. Both of these were remote, so I don’t know if I can say I ‘attended’ them.
So lots of pieces of paper and academic experience. I think they’ve been worthwhile, even though I still don’t have a regular job that uses any of them!
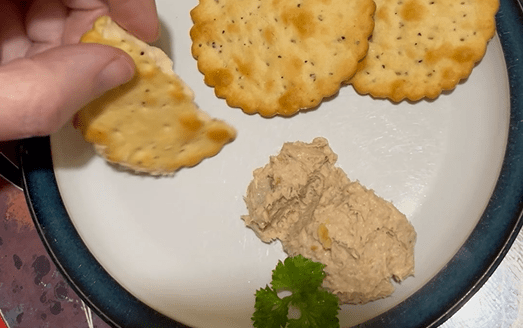
This is very quick to make and adaptable. If you’re not keen on smoked fish, add more cheese. If you love smoked fish either reduce the cheese or just eat the fish as is.
Mrs S did the camerawork, thanks to her for helping!
Ingredients
2 smoked mackerel fillets
100g cream cheese (Philadelphia or other)
Horseradish sauce or fresh horseradish (optional)
Cayenne pepper (half a teaspoon or so)
Fresh parsley
Crackers to serve
Butter, if you’re going to keep it for a while.
Simply add the ingredients to a food processor and whizz up to the desired consistency. You can keep a few flakes back if you want a few lumps.
I’m not keen on horseradish, but Mrs S loves it. So there are two versions of this, one with and one without.
If you want to keep the pâté for a while, put some in a ramekin. If you’re like us you may have a cupboard full of empty Gü pots – these make excellent ramekins for pâté. Melt some butter in a pan and pour a thin layer over the pâté. This should keep for three days, though it never lasts quite that long in our house.
You can get smoked mackerel with black peppercorns on – this can also be used but will obviously add pepper to the flavour. And you can add black pepper instead of cayenne or paprika if you want that sharpness that black pepper brings.
The crackers are Tesco’s own salt and pepper crackers. These are some of the best I’ve ever had, they bring out cheese flavours in a way that few other crackers do. They aren’t as good a Peter’s Yard sourdough crackers, but also not quite as expensive.
An experiment with bourbon may explain the high reputation of Japan’s whiskies
During my research for an earlier chemistry of whisky article, I came across an account of an experiment on how transporting barrels impacts the flavour of bourbon. Bourbon barrels are commonly used to age whisky not only in Scotland, but in England, Ireland, Japan and India.
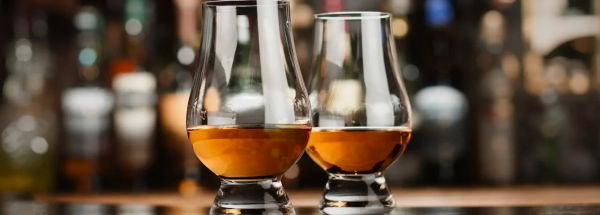
Whisky in Glencairn glasses. These glasses were developed in the early 2000s, inspired by the shape of the whisky blender’s glass.
I’d been looking at how the flavours of charred oak affect the character of bourbon. This article in Wine Enthusiast drew my interest. It described a fascinating experiment by Trey Zoeller, the founder of Jefferson’s bourbon distillery in Kentucky, USA. I originally put it in a footnote, but the whole thing became a bit extended and so I decided to convert it into an article.
Barrel aging bourbon
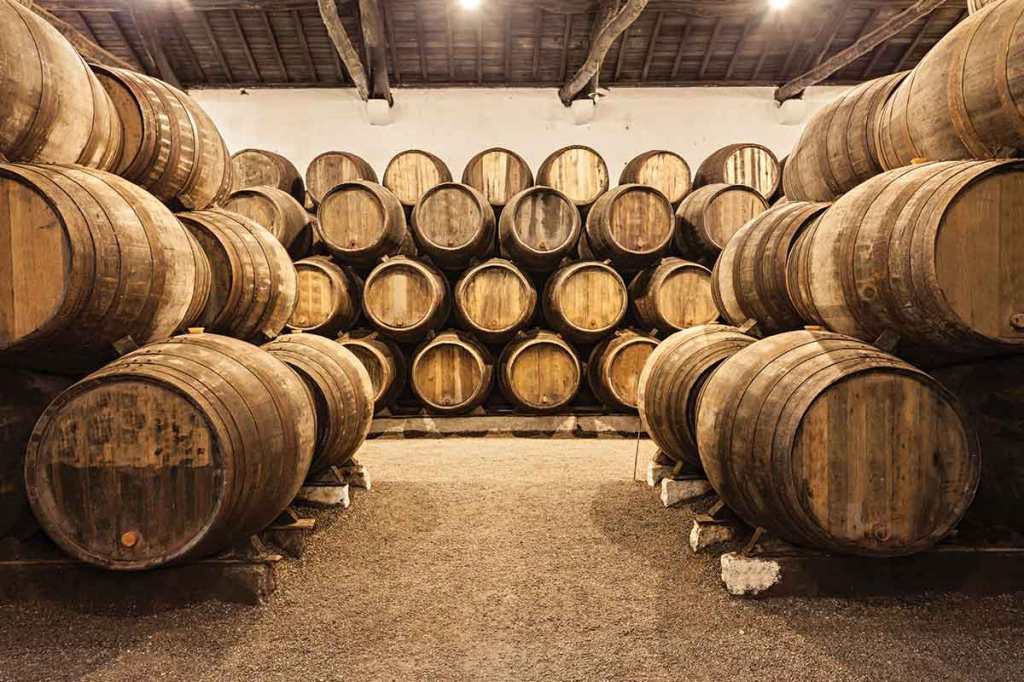
The usual practice when aging whisky/ whiskey1 is to have the barrels stacked in a warehouse holding maybe 60,000 barrels with 200 litres in each and let nature take its course.
Since 2012 Jefferson’s, based in Kentucky, has offered a limited ‘Ocean Cask’ expression. They send the barrels on six-month voyages at sea, where they are heated, chilled and shaken about before coming back to Kentucky to be bottled. Exact numbers of barrels aren’t available, but multiple shipping containers with 200 barrels each are now sent on these voyages. The 200-300 bottles that are filled from each barrel retail at $83 (about £60)2 for a 750 ml bottle, more than double their standard bourbon ($31).
Without good roads, the best option was for distillers to send barrels down the Mississippi with the spring flood, then by ship from New Orleans to New York for bottling. In 2022, Jefferson’s sent two barrels of bourbon on a replica journey down the Mississippi and then to New York to see if this process was the source of Kentucky bourbon’s high reputation.
A barge on the Mississippi.
The agitation of the spirit in the barrel during transit did change the flavour, both chemical analysis and blind tasting showed a distinct variation. This could explain the good reputation that Kentucky bourbon enjoyed in New York.
Relevance to whisky
Bourbon is similar to whisky, in that you take a grain-derived spirit and age it in wooden barrels until it has absorbed flavours from the barrels and the environment. The difference is the type of grain you use. Malt whisky is made using barley. By law, bourbon must contain over 51% corn grain spirit. Anything else is grain whisky3.
As my previous blog discussed, a lot of whisky is aged in used bourbon barrels. The environment in which the whisky aging takes place influences the flavours extracted from the wood. Bourbon is produced in the generally temperate continental climate of Kentucky, so the mix of grains (the ‘mash bill’), the type of still used and the cut of the spirit are more important in determining the particular flavour4 of the bourbon.
The flavours extracted from used bourbon barrels by the maturing whisky will be representative of the original spirit. The mix of flavour molecules extracted will also vary depending on several factors including the ethanol content of the whisky, temperature, humidity, and time.
Scotland is a cool, damp country and produces characteristic whisky. By law whisky must be aged for at least three years to be sold as Scottish whisky. Age adds to the flavour, smoothness and cost of a whisky. The oldest whisky I’ve ever has is a 20 year old Highland Park – a slightly peaty but incredibly smooth drink that cost about £25 for a double5.
Japan and the getting back to the point
All this is fine, but what does the Jefferson bourbon experiment have to do with whisky? After all, shipping or moving thousands of heavy barrels isn’t a commercially viable option unless you’re going to add a premium to an already expensive product.
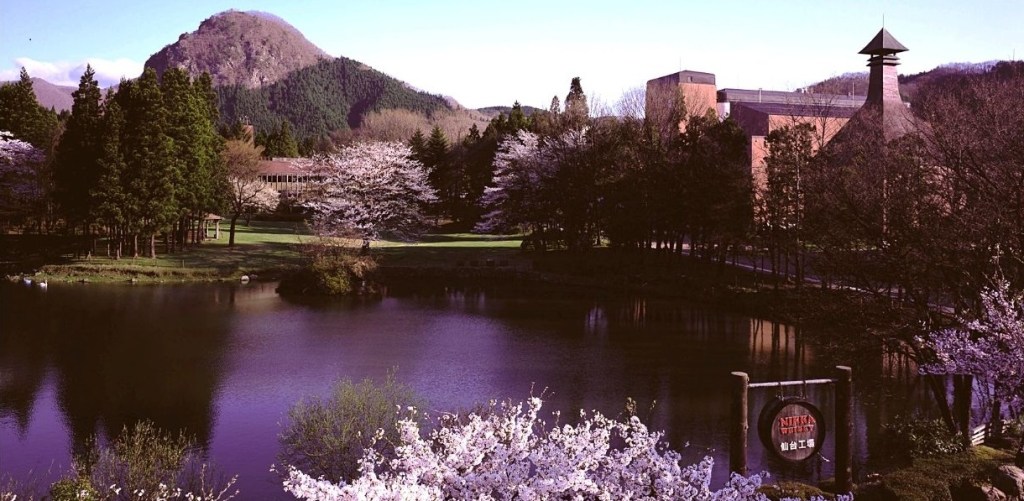
Japan has a well-established whisky manufacturing culture, with the first whisky distillery – Suntory – opening near Kyoto in 1923. Following a disagreement between the founders, a second distillery, Nikka, was opened near Sapporo on the north island of Hokkaido. This site was chosen because the climate was more like Scotland than the sub-tropical Kyoto.
The Nikka distillery near Sapporo. A new place I want to visit, it looks lovely.
Japan’s whisky industry was established after thoroughly researching the Scottish methods and equipment, even buying old stills from distilleries and, in places, a climate that mimics that of Scottish. From those beginning decades ago, Japanese distilleries have developed the craft to produce a distinct drink that has its own place in the world of whisky.
What is perhaps unique in Japan is that is a whisky-producing country that also sits on a tectonically active region, at the junction of at least three active geological faults. Low intensity tremors are frequent throughout the islands with major quakes occurring annually.
So, while shipping thousands of barrels by sea to enhance the extraction of flavours isn’t economically feasible, it could be that the character of Japanese whisky is changed through frequent shaking by earthquakes. It could be that, in their quest to create a Scottish whisky with a Japanese feel, the geology of their country has gifted the Japanese whisky industry an added influence that the distillers of other countries will find it difficult to emulate.
Traditionally, whisky is from Scotland, whiskey isn’t. Though some Japanese distilleries use ‘whisky’. ↩︎
I had to enter an address in the USA to get this price. I picked 1060 West Addison St, Chicago. ↩︎
Quinoa can be used to make whisky, even though it’s not technically a grain. ↩︎
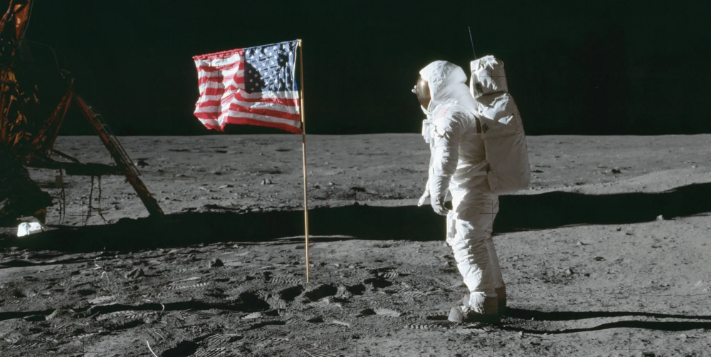
The main event in the year I was born was something that I consider the crowning achievement of humanity: man landing on the moon.
Neil Armstrong on the moon. Not much else to say about it.
Thousands of genius engineers and scientists worked with one aim: to get people to the moon and back again safely.
Other events
The first Jumbo Jet flew in January and the first Concorde flight took place in March. So as far as getting people off the ground, it was quite a good year.
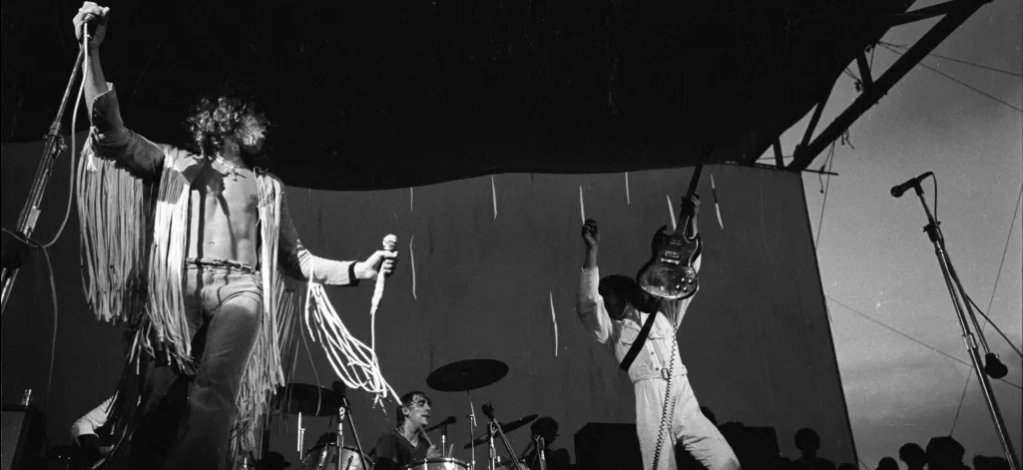
In music, the Woodstock festival and the first Isle of Wight festival took place. Black Sabbath recorded their first album in October, though it wasn’t released until 1970. The Beatles split up and the disastrous Altamont Free Concert put a lid on the flower power era.
Moon Landing
Over the years there have been a lot of crazies who insist that the moon landings didn’t happen. Some of these range from the reasonable – we didn’t have the technology so it must have been faked somehow – to the frankly bonkers.
A lot of issues from the reasonable end of the spectrum are down to a poor understanding of how cameras work and physics. There are no stars in the pictures because cameras have limited dynamic range. And if they wanted to fake it, wouldn’t they have put stars on the roof of the studio? The flag does act weird, it wobbles for a long time. This has been ascribed to the ventilation in the studio moving the flag. The same ventilation doesn’t affect the dust on the floor, though.
The bonkers end is more fun, though. We never went to the moon because the moon is a NASA hologram or a government hoax. We know this because spheres can’t reflect light so the moon is flat, if it is real at all.
The moon is a space station and an artificial satellite brought here 13000 years ago by The Reptilians – the Draco Empire and grey aliens.
The Moon was made by scooping out the Grand Canyon and filling it with helium.
The astronauts would have been killed by the van Allen (or van Halen, the name changes) belt radiation. And they can’t live in space anyway because there is no magnetic field for their hearts to work off of.
I have a file of various conspiracy theories. Whenever I’m feeling down and a bit stupid, I look at these and realise I’m not so daft after all.