Category: Recipes

Recipes we use as a family. Nothing gourmet, and I will try to put recipes and methods ahead of any stories relating to the recipe.

  • Carrot cake through the years

    Carrot cake through the years

    What we think of as the classic carrot cake recipe is relatively new. Adding raw carrots and oil to a cake isn’t a normal way to make a cake, but is does work. But carrot cake as a thing hasn’t evolved, as much as jumped systems.

    How did we get here?

    Talking about cake over dinner (as you do), we got to thinking about when carrots were first incorporated into a cake. The consensus around the dinner table was that it was likely a wartime1 thing. Carrots were a substitute for sugar in Britain2, to the extent that a carrot on a stick was a treat for children.

    Carrots on a stick, a penny each. Wartime sugar rationing meant that children had to get their sweet kick elsewhere.

    A quick look on Wikipedia suggested that this was only part of the answer. The earliest carrot cake recipe I can find is from the 16th century and was essentially a stuffed carrot.

    A Booke of Cookrye, A.W. (1587)

    This book, published in several editions in the late 16th century, contains the most disturbing cooking instruction I’ve ever read:

    Take a red cock that is not too olde, and beate him to death, and when he is dead fley him and quarter him in small peeces, and bruse the bones everye one of them.

    This is a recipe for a chicken dish to feed someone with consumption (tuberculosis). This is not chicken soup for the soul3.

    Less dependant on extreme violence to poultry is the recipe for a pudding in a carrot:

    A Book of Cookrye and the recipe for a pudding in a carrot.

    To make a pudding in a Carret root.

    Take your Carret root and scrape it fair, then take a fine knife and cut out all the meat that is within the roote, and make it hollow, then make your pudding stuffe of the liver of a gooce or of a Pig, with grated bread, Corance [currants], Cloves and mace, Dates, Pepper, Salt and Sugar, chop your Liver very small, and perboile it ere you chop it, so doon, put it in your hollow root.  As for the broth, take mutton broth with corance, carets sliste, salt, whole Mace, sweet Butter, Vergious [sour grape juice] and grated bread, and so serve it forth upon sippets [toasted bread].

    It’s a carrot stuffed with chopped liver with spices and currants, served with a sour bread-thickened broth on toast. They must have had much bigger carrots in the 16th century, I can’t see anyone fiddling about trying to stuff chopped liver into a modern carrot.

    Antoine Beauvilliers (1754 – 1817)

    I had a search for old recipe books and found that The Internet Archive has Volume 1 of Beauvilliers’ L’ Art de Cuisinier in French and the full text translation into English from 1827. Beauvilliers’ recipe is in volume 2, so I used the English translation4. As shown below, it’s somewhat lacking in detail and, like the book itself, designed for mass catering.

    Text reads: Carrot Cakes. — Gâteaux de Carottes. Take twelve large carrots, the reddest possible; boil them in water with a little salt; take out the hearts and drain them; put them through the cullender into a stewpan; dry them upon the fire, as pâte royale; make a cream pâtissière; put in as much flour as it will take; add the carrots, with a little confected orange-flowers minced, three quarters of a pound of sifted sugar, four eggs one after another, six yolks, and a quarter of a pound of melted butter; mix all well; whip the whites; mix them in lightly; prepare a stewpan as for the gâteau de riz; three quarters of an hour before serving put it into the oven.
    Screenshot of Beauvilliers’ carrot cake recipe.

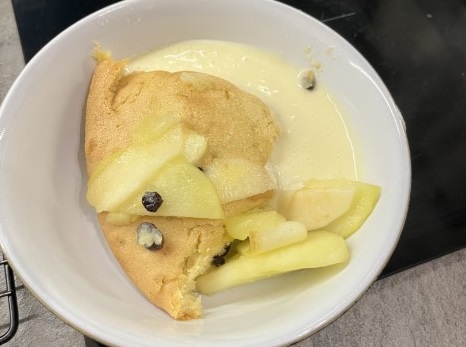
    There is no oil in this recipe. It requires a total of twelve eggs (four whole, six separated and a further two in the cream pâtissière). This is a baked, starch stabilised custard rather than what we would think of as a cake. The closest thing available now are baked custards such as the French far Breton and tarte aux fruits, Portuguese pastel de nata, and British custard tarts 5. These don’t have the added whipped egg whites and so are denser than Beauvilliers’ carrot cake. But, since a cake is a solid mass of anything, it’s still a cake.

    Far Breton, a thick, baked custard with prunes. From the Brittany region of France. I’m not keen on prunes, but there is a recipe that uses caramelised apples, which I might try.

    Carrot cake, butter cake style

    For a more cake-like cake, we look at old recipes such as the one below. This is from a 1981 article in the Washington Post. It’s not clear when it originated, but the author said it was four or five generations old, so maybe 1900-1910. This is a cake with butter as the fat and really looks like a cake we would make today. Although I doubt we would start preparation two days in advance and soak sultanas in brandy overnight. This is a boiled cake, in which the fruit is rehydrated by gently boiling in a syrup. See my recipe for more details.

    This is from a Washington Post article, published in 1981. The recipe was described as being four or five generations old, so could be early 20th century.

    Early modern oil cakes

    Further searching revealed a 1929 recipe that uses oil. This was the product of at least two innovations over the previous 100 years. First, the availability and acceptance of sodium bicarbonate as a leavening agent for domestic use6. Second, bland vegetable oils became more readily available and so the use of oil rather than solid fats became possible.

    Earliest carrot cake recipe that uses oil as part of the ingredients. This is from the 1929 edition of The Bride’s Cookbook, published in Wichita, Kansas.

    It took a while for the UK to start making carrot cakes with oil. A 1943 British recipe is similar to Ethel Amsler’s, using 3 oz of precious sugar and 4 oz carrots. There is no spice or nuts in the wartime recipe; such things were likely hard to come by.

    World War 2 carrot cake. I’ve not iced this one, because wartime restrictions would have meant that the sugar would have been used for something else.

    I have made this, and the results were good. It came out as a pleasant, slightly crumbly cake that lasted about two days before all of it was eaten.

    Modern carrot cake

    I also made a carrot cake using a modern, oil based, recipe. The result was a success, by which I mean it all went very quickly before I could take a good photo of the inside. I will have to make another; luckily, it’s the favourite cake of one of our children so I won’t get any complaints.

    Carrot cake, made using an oil-based recipe and topped with cream cheese icing.

    The texture contrasts markedly with the World War II cake recipe. It’s softer and less crumbly than the butter cake. I only did one layer – in the recipe you can double all quantities and sandwich the layers with cream cheese icing.

    Jumping systems; cake taxonomy

    We can divide cake into several systems (up to 11, depending on who you ask), divided by the aeration method, number of eggs, use of flour, type of fat and leavening method. In this approach, carrot cake started as a baked custard, moved into a butter cake before finishing as an oil cake.

    What all this means is that as long as a baked batter has sugar in, it’s a cake. Add carrot, and you’ve got carrot cake. The rest is fiddly little details.

    1. By which we mean World War 2 (1939-1945). ↩︎
    2. Sugar was rationed to 8 oz (225 g) per adult per week. ↩︎
    3. There is a Japanese belief that minimal stress contributes to better-tasting meat. This is the opposite of that. ↩︎
    4. This is true, and it’s not because my French isn’t up to reading a 200 year old recipe. Oh no. ↩︎
    5. One of my father-in-law’s favourites. ↩︎
    6. This is referred to as ‘chemical leavening’, in contrast to yeast or aeration by whipping. Some way of getting air in is necessary for a light cake. ↩︎
  • Easy boiled fruit cake recipe

    Easy boiled fruit cake recipe

    A boiled fruit loaf, perfect with tea or to fill up the corners1 after dinner.

    Eat the cake, buy the apron!

    Ingredients

    225 g self-raising flour

    175 g soft brown sugar

    500 g mixed dried fruit and peel

    125 g unsalted buter

    225 ml tea (or water)

    2 teaspoons mixed spice

    ½ teaspoon bicarb

    2 eggs (beaten)

    Method

    Line a loaf tin with parchment paper

    Melt the butter and the sugar with the tea2 in a large saucepan. Add the dried fruit and peel, then boil gently3 for about ten minutes to let the fruit rehydrate.

    Fruit, sugar, butter and tea boiling gently. This rehydrates the fruit and lets it absorb the flavour of the tea.

    Remove from the heat and allow to cool.

    Preheat the oven: 140 °C (fan), gas mark 3.

    Tip the flour, mixed spice and bicarb into a bowl. Add a pinch of salt and the cooled fruit mixture. Stir well.

    Flour, bicarbonate of soda, mixed spice and a little salt.

    Add the eggs and mix in.

    Finished batter and the prepared loaf tin. I used premade loaf tin liners because cutting and folding parchment to fit is a right faff.

    Pour the batter into the prepared loaf tin and bake for about 50 minutes. It’s done when a skewer comes out clean.

    It’s had 30 minutes, needs longer.

    Leave in the tin for ten minutes to cool a bit before turning it out to cool properly on a baking rack.

    Serve sliced by itself, spread with butter, or with some strong cheese.

    Finished fruit cake.

    Have it on an apron!

    This might be unusual, but you can also have the recipe on a apron, from the Heath Way Prints shop.

    Fruit cake recipe on an apron. Can you spot the spelling mistake? I didn’t!

    I did the design work in Canva. The cartoon of the cake is the photo above rendered by AI. I don’t normally use AI for design work, but this saved some time and it’s my original photo so no copyright issues.

    You can also get the recipe on a t-shirt or art prints, if you like! Just click on the buttons to go to the shop.

    Nutritional advice

    Serving size: Slice
    Servings: 8
    Amount per serving 
    Calories520
    % Daily Value*
    Total Fat 15.7g20%
    Saturated Fat 8.9g44%
    Cholesterol 127mg42%
    Sodium 223mg10%
    Total Carbohydrate 92.6g34%
    Dietary Fiber 3.1g11%
    Total Sugars 58.5g 
    Protein 8.1g 
    Vitamin D 18mcg88%
    Calcium 155mg12%
    Iron 3mg17%
    Potassium 593mg13%
    1. From The Lord of the Rings after the main feast for Bilbo’s 111st birthday party, guests were “at that delightful stage which they called ‘filling up the corners’. They were sipping their favourite drinks and nibbling at their favourite dainties.” ↩︎
    2. Choose whatever tea you like. I used PG Tips since that is what we drink. Earl Grey would add its own particular flavour to the cake. If you’re daring, go for something smoky like lapsang souchong or perhaps a green tea for variety. ↩︎
    3. Hence the description of the recipe as a ‘boiled fruit cake’. You don’t boil the cake. Only an idiot would think that. ↩︎
  • Beef stew and dumplings

    Beef stew and dumplings

    What’s your favorite thing to cook?

    I love this dish, the smell fills the house when it’s in the oven. It’s also easy to prepare, although it does take a long time to cook.

    We have two versions in this house, I do a slow-cooked version with cannellini beans (recipe here), Mrs S uses a pressure cooker and her recipe features oxtail soup (must be Heinz).

    Both are delicious, with different textures and many common ingredients. Beef, onions, garlic, carrots for starters. I put potatoes in the stew, Mrs S does them separately. But the most important component of the stew is the dumplings.

    Uncooked dumplings. You don’t need to be very rigorous getting spherical dumplings, rougher dumplings will fluff up just the same.

    Dumplings are easy enough to make, as long as you use suet and self-raising flour you can’t really go wrong. A generous helping of dried herbs and chilli add some flavour. We give them 20 minutes steaming over the stew. This allows the dumplings time to swell and acquire the required soft texture and some of the flavour of the stew. It also means that some moisture from the stew is lost so the stew thickens a bit.

    Dumplings done, stew ready to serve.

    I’ve just noticed that there’s a very angry-looking dumpling in the middle of the picture. Just as well we ate it before anyone noticed.

  • Welsh cakes

    Welsh cakes

    Pice ar y maen

    The first of March is St David’s day! Triple celebrations for us, since Mrs S is 3/4 Welsh, my first name is David and it is our oldest’s birthday.

    This recipe follows the hand-written recipe Mrs S got from her gran (Mrs K) in 2007.

    Mrs S did the camerawork, thanks to her for helping!

    Ingredients

    200 g self-raising flour

    100 g margarine (“baking spread” or similar)

    75 g caster sugar

    75 g currants

    1 or 2 tbsp milk

    one egg, beaten

    1/2 tsp mixed spice

    Video link

    Mixed spice

    For the mixed spice I combined one teaspoon each of ground mace, cinnamon and allspice with half a teaspoon each of ground cloves, ginger and coriander (I couldn’t find ready-made spice mix in the shop). Nutmeg can also be added to the mix, but we only had whole nutmeg and I couldn’t be bothered to grind any. There are recipes Welsh cakes that say to use only mace, I may try that some time.

    Spices used to make the spice mix for the Welsh cakes. This is not an endorsement of Sainsbury’s spices, by the way.

    Method

    Combine the flour and margarine in a bowl and rub together to make crumbs. This is the same procedure for making crumble for puddings, so it’s a proper life skill.

    Then add the flour, caster sugar, currants and spice. Mrs K’s recipe calls for half a teaspoon, though she said it could be left out.

    Mix well, then add the beaten egg and milk. Combine all these until you have a smooth dough. If the mix is too wet (as mine was), add flour until you get a good dough. Add milk if the mix is too dry.

    We left the dough to settle for an hour, so the flour could absorb all the wet ingredients.

    On a floured surface, roll out some of the dough mix to be about 5 mm (¼ inch) thick. Use a gauged rolling pin if you have one (I don’t). Cut out circles (a cutter is best for this), then the cakes are ready for frying.

    A rolling pin with thickness gauges. If you need to roll out dough to a particular thickness, this is an excellent tool.

    Frying the cakes

    Traditionally a griddle would be used for frying. You can get flat griddles for induction hobs, but you may as well use a frying pan, as we did. Unless of course your oven has a built-in griddle, in which case I’m very jealous.

    Like with any pan-fried cakes (eg pancakes) the pan needs some fat in it to help cook the food and also to provide extra non-stick. We used a 1:1 mix of vegetable oil and butter. If you want to be traditional about it, use lard. Don’t use a lot otherwise you could end up with a very fatty tasting cake.

    In a hot pan (or on a hot griddle) fry the cakes for about a minute on each side. You will need to use judgment here, you want the cakes to be a dark brown but not burned. The cakes will swell as they cook, so make sure they cook long enough on each side for this to happen.

    Frying Welsh cakes. The cakes swell during cooking, this is the self-raising flour doing its thing. The swelling means that the outside of the cakes will be crisp but there is a soft centre.

    This swelling – due to the self-raising flour – combined with frying a thick piece of dough gives the cakes their double texture. The outside will be crisp and there is a lovely soft and chewy interior. A bit like an armadillo.

    When they are cooked put them on a plate with a piece of kitchen towel on to absorb excess fat. Cook the whole batch; we got 12 cakes from this mix, the size of your cutter will determine how many you get.

    Serving

    Sprinkle with granulated sugar as a finishing touch. They are good enough to eat warm or cold. Just eat them as they are, but if you like you can put jam, honey or Nutella on them, spread some butter or thick cream on them. As a savoury alternative, pop a chunk of cheese (Caerphilly might be appropriate) on it, if you’re one of those people who likes cheese with fruit cake.

    Finished Welsh cakes. We ate them with just the sprinkling of sugar. You eat them however you want, you made them after all.

    Changes

    Having eaten my share and discussed with Mrs S and the rest of the family, I think we will add a full teaspoon of spice to the next batch. Mrs K wasn’t one for spicy food, so her taste buds were likely more sensitive than ours.

    It may well be possible to air-fry these. We don’t have an air-fryer, but if you do let me know if it’s doable.

  • Smoked mackerel pâté

    Smoked mackerel pâté

    Great to go with crackers or on toast.

    This is very quick to make and adaptable. If you’re not keen on smoked fish, add more cheese. If you love smoked fish either reduce the cheese or just eat the fish as is.

    Mrs S did the camerawork, thanks to her for helping!

    Ingredients

    2 smoked mackerel fillets

    100g cream cheese (Philadelphia or other)

    Horseradish sauce or fresh horseradish (optional)

    Cayenne pepper (half a teaspoon or so)

    Fresh parsley

    Crackers to serve

    Butter, if you’re going to keep it for a while.

    Simply add the ingredients to a food processor and whizz up to the desired consistency. You can keep a few flakes back if you want a few lumps.

    I’m not keen on horseradish, but Mrs S loves it. So there are two versions of this, one with and one without.

    If you want to keep the pâté for a while, put some in a ramekin. If you’re like us you may have a cupboard full of empty Gü pots – these make excellent ramekins for pâté. Melt some butter in a pan and pour a thin layer over the pâté. This should keep for three days, though it never lasts quite that long in our house.

    You can get smoked mackerel with black peppercorns on – this can also be used but will obviously add pepper to the flavour. And you can add black pepper instead of cayenne or paprika if you want that sharpness that black pepper brings.

    The crackers are Tesco’s own salt and pepper crackers. These are some of the best I’ve ever had, they bring out cheese flavours in a way that few other crackers do. They aren’t as good a Peter’s Yard sourdough crackers, but also not quite as expensive.

  • Yorkshire puddings

    Yorkshire puddings

    Something a bit different – a recipe video! Yorkshire puddings are a great accompaniment to any roast, most traditionally with roast beef.

    Mrs S did the camerawork, thanks to her for helping!

    Ingredients

    45 g plain flour

    A pinch of salt

    One egg

    Water and/ or milk

    Fat or oil for cooking

    Add the flour, salt and egg to a mixing bowl and mix well. You can add other ingredients here – I often add black pepper or chilli flakes to add some interest to the puddings.

    Add water or milk to make a batter. I’ve used water here because I like crispy puddings, you can add milk or 50/50 milk and water to get fluffier puddings if you prefer.

    Allow the batter to rest for at least an hour, longer if possible. This gives the starches in the flour a chance to absorb all the moisture and gives you a smooth batter.

    Pre-heat the oven to at least 220 °C, gas mark 8. Turn the fan off, if you can; this stops the puddings getting blown out of shape as they rise. Put fat or oil into a suitable dish and heat this through. I used beef fat here; I’d just roasted a beef joint and there was plenty of basting fat. Normally I use vegetable oil or peanut oil. The fat needs to be able to withstand high temperatures, so avoid olive oil.

    Add the batter to the hot fat. Bake for 15 minutes – don’t open the oven! Our oven has a glass door, yours may not, but don’t peek or the puddings might collapse!

    When they’re done, serve with your roast dinner.

    You can also make huge Yorkshires and serve a dinner inside them. Or, once they’re cooled, some people like to have jam or honey on the puddings as a dessert.

  • Slow beef stew

    Slow beef stew

    A favourite most of the year, more so when it’s chilly. This version takes two hours or more to cook. There’s a fast recipe that takes less time and uses a pressure cooker.

    Timings: prep – 10 min Cook – 2 hours (or more)

    Feeds four. Total cost (Nov 2025): £6.00 (stew) 60 p (dumplings)

    Timings: Prep: 30 min. Cooking: 40 min Eat: 10 min

    Ingredients

    Stew

    400 – 500 g cubed beef

    Half a diced onion

    two cloves garlic

    two carrots, diced

    400 g potatoes, cut into 2 cm pieces

    one turnip, dice to the same size as the potatoes

    Dried herbs – oregano, thyme and a bay leaf

    Fresh rosemary (from the garden)

    chilli flakes

    beef stock pot

    Veggie gravy granules

    can of cannellini beans

    Dumplings

    100g self raising flour

    50g suet (beef or vegetable)

    Salt and dried herbs (a teaspoon or so of oregano, some black pepper and anything else you fancy)

    water

    The beef is the main cost of this dish, you can economise a bit but with cheaper beef you get more hard fat, which is unpleasant.

    You’ll need a frying pan and a casserole dish.

    Your choice of veg to add to the stew is personal, of course. I add turnips because they add an earthy taste to the stew, which not everyone likes.

    1923 Bamforth postcard celebrating the turnip. James Bamforth & Co were probably best known for their saucy seaside postcards
    Turnip! Baldrick’s favourite vegetable, they add an earthy flavour to the stew. Swedes can also be used.

    Preheat the oven to 160 C/ gas 5.

    Brown the beef in a little oil and add to the casserole dish when done. Fry the onions, garlic, herbs and spices before adding them to the pan. Dice the potatoes and turnip and add these to the rest of the ingredients. Add the stock pot or stock cube.

    Beef, potatoes and turnip in the pot. Onions, garlic and herbs are hidden. Need to add cannellini beans and stock.

    Drain a can of cannellini beans, add these and enough water to cover the ingredients. Give the while thing a good stir and put in the oven for at least 2 hours.

    Beans and stock added. Now to cook for at least two hours.

    Make the dumplings: Add the flour, suet, herbs and salt to a bowl. Gradually add water and stir well to get a dough that you can form into balls. These don’t need to be perfect. If the dough is too wet, add flour to the mix until you’re happy with how the dough behaves.

    Uncooked dumplings. You don’t need to be very rigorous getting spherical dumplings, rougher dumplings will fluff up just the same.

    About 20 minutes before serving, add the dumplings to the stew and cook for a further 20 minutes.

    Slow cooked beef stew recipe.
    Dumplings done, stew ready to serve.

    I did this using the slow method because we had to split out mealtime. Younger daughter has tap lessons that run until nearly 9 o’clock, so I served the rest of us at seven, then reheated the stew and added fresh dumplings to cook while I went to get her.

  • Butternut squash soup

    Butternut squash soup

    Younger daughter made this for us, loosely based on a recipe from BBC Good Food but adapted somewhat. This is a spicy version, alter the amount of chilli as you wish.

    Timings: Total = 2 hours. prep – 10 min Cook – 30 minutes. Total includes ‘leaving to absorb flavours’ time.

    Feeds four. Total cost (Nov 2025): £3.00 (soup) £2.00 (nice bread)

    Ingredients

    One butternut squash (about 1 kg)

    1 tablespoon butter

    2 tablespoons olive oil

    1 onion, diced

    2 garlic cloves

    1 tablespoon dried chili flakes

    1/2 teaspoon paprika

    800 ml vegetable stock

    4 tablespoon crème fraiche

    You’ll need a roasting dish, a large saucepan and a blender. We used a stick blender for this. A large plastic food box or a large zip-tie bag will also be needed.

    Peel, deseed and dice the butternut squash.

    The skin of the butternut squash is quite thick. Either use a good peeler or a knife to remove the skin.
    Scoop the seeds out with a tablespoon. You can dry them off and separate from the stringy bits then roast them for a snack.

    Add the olive oil and paprika to a large plastic food box or a large bag. Add the diced squash, mix well and leave for an hour to absorb the flavours. You can use a bowl to do this if you don’t have a box or bag to hand.

    Set the oven to 180 C/ gas 6. Fry the onions in butter over a low heat. After 5 minutes, add the garlic and chilli flakes and continue to fry.

    While the onions are frying, put the squash and the oil into a roasting dish and roast for 30 minutes. Stir them at least once during the roasting.

    After 30 minutes the squash will be soft (squashy!) and the onions slightly caramelised. Add the vegetable stock to the onions. Take the squash out of the oven and add this to the stock.

    Diced squash, roasted.
    Add the roasted squash to the onions and stock. This will add some much-needed colour to the soup.

    Using the stick blender (or other device), liquidise the soup until it’s smooth and lump-free.

    The stick blender makes the mushing up of the squash easy. If you want a smoother soup, a liquidiser is a better bet.

    Warm through and add the crème fraiche either to the completed soup or swirl into each serving as you dish up.

    Finished soup. We got some crusty bread to go with it. A sprinkling of parmesan would also add to the flavour.

    We got some nice bread to go with this, though regular Warburtons (or other sliced bread) is fine as well.

  • Eve’s pudding and custard

    Eve’s pudding and custard

    This was a favourite growing up. My mum would often make puddings on Sundays – how she found the time I don’t know.

    Feeds four.

    Timings: Prep: 30 min. Cooking: 40 min Eat: 10 min

    Ingredients

    Filling

    600 g Bramley apples1

    Caster sugar to taste (about 60 g)

    Lemon juice

    Mixed dried fruit (optional)

    Sponge topping

    100 g caster sugar

    100 g butter or baking margarine

    2 eggs

    100 g self-raising flour

    Custard

    100 ml double cream

    350 ml whole milk

    2 egg yolks

    1 1/2 tablespoons cornflour or sauce flour

    50 g caster sugar

    1/2 teaspoon vanilla essence

    You’ll need a big saucepan, a large bowl and a baking dish. An electric mixer will also help.

    Peel and slice the apples and heat gently in a saucepan. Add the caster sugar to taste2 and lemon juice to stop the apples going brown. Once they have started to fluff up turn off the heat and allow to cool. Take the butter out of the fridge.

    When the apples are cooled, set the oven to 160 °C (fan), gas mark 5. Put the apples into a buttered oven-proof dish. If you’re adding dried fruit or mincemeat put this on top of the apples.

    Apples in a dish with some dried fruit on top. This is the stuff that I use for fruit cake, it includes dried peel as well as raisins and sultanas.

    Start making the sponge while the oven heats up.

    Add caster sugar, butter and self-raising flour to a mixing bowl. I used a plastic bowl – ceramic bowls are supposed to be better for this type of thing since they keep the batter cool. Crack the eggs into the dry ingredients and beat for at least five minutes. An electric mixer is best for this, do it by hand if you’re feeling strong.

    Sponge batter in a pink bowl.
    Finished sponge mix. You need to mix this for at least five minutes to get air in so the sponge will rise.

    Put the sponge mix on top of the apples. Make sure it’s covering the apples, then pop it in the oven for 40 to 50 minutes.

    When it’s done, the sponge should have risen and be a nice golden colour.

    Eve’s pudding. Remembered while I was dishing up that I needed a photo for the blog.

    Serve hot with custard (method below) or ice cream.

    With custard!

    Custard

    Make the custard when you’re ready – this should be timed to make sure the Eve’s Pudding is still warm.

    Put the cream and milk in a pan and warm through to just below boiling. If you have a thermometer, heat the milk to about 85 °C.

    In a large bowl, whisk the egg yolks, cornflour, sugar and vanilla. A hand whisk will be fine for this.

    Cornflour, sugar, egg yolk and vanilla essence, mixed and ready to have warm mil added.

    Gradually pour the hot milk onto the sugar mixture, whisking constantly. Two of us did this together (I had help from younger daughter, who made crème anglaise in Food Tech at school); she poured and I whisked.

    Pour the mixture back into the saucepan. Heat gently with stirring until it thickens to your liking. Don’t heat for too long or it might curdle.

    Custard warming through and thickening up.
    1. These are the best cooking apples. If you can’t get these because they’re out of season or you live outside the UK, Granny Smiths or other cooking apples will do. ↩︎
    2. Tastes vary. Bramley apples are famously tart, you may want a lot of sugar. Unless you’re like my grandad who used to eat Bramleys as eating apples. ↩︎
  • Chicken and chorizo meatballs

    Chicken and chorizo meatballs

    Oven cooked meatballs! Remember to use a big pan for the tomato sauce or the meatballs won’t fit in.

    Feeds four.

    Timings: Prep: 20 min. Cooking: 40 min Eat: 10 min

    Ingredients

    500 g chicken mince

    100 g breadcrumbs

    A good pinch of salt

    One egg

    100g chorizo

    A can of tomatoes

    Onion and garlic

    Vegetable stock cube/ stock pot

    About a teaspoon each of dried oregano, thyme and chilli flakes. Add other herbs to your liking, and black pepper.

    2 tablespoons oil (peanut, vegetable or whatever is to hand)

    Pasta – about 75 g dry weight per person.

    You’ll need two big saucepans and a baking tray. Oven to 180 C (fan), gas mark 6.

    If you can’t get chicken mince, use a blender to mash up the required amount of chicken thighs1. Use the same blender to shred the chorizo (and make the breadcrumbs, unless you want to buy them).

    Breadcrumbs and bits of chorizo in a food blender.
    Breadcrumbs and shredded chorizo in a Minimixer.

    Combine the mince, chorizo, breadcrumbs, egg, salt, herbs and spices in a bowl and mix well. You can do away with the egg if you add more salt or leave the mix for longer – overnight is best2. Form into 12 or so meatballs. Smaller ones will cook quicker, you might make 20.

    Raw meatball mix in a green bowl.
    Meatball mix. The salt and egg help to bind the meatballs.

    Distribute the raw meatballs onto a baking tray with an oiled baking sheet. Brush with a little oil and bake for 20 minutes until browned – check they are done with a meat thermometer if you have one.

    Five raw meatballs on a foiled baking tray.
    Ready to cook, raw meatballs on an oiled, foiled baking tray. The oil helps brown the meatballs and lessen sticking to the foil.

    While the meatballs are in the oven, make the tomato sauce. It would be an option to make this earlier – a couple of hours earlier – since the flavour improves with time. Depends on how busy you are.

    Fry chopped onion at a low heat for at least 5 minutes until they are translucent. If you have time, fry at a very low heat for even longer until they caramelise. Add garlic, spices and dried herbs, fry for another minute.

    Add the tin of tomatoes, rinse out with half a can of water and add this to the sauce. Add the stock cube/ stock pot and simmer.

    Boil the pasta as directed on the packet. It’s a good idea to time it so that the pasta is done about five minutes after the meatballs are come out of the oven.

    About 12 cooked chicken meatballs. They are paler than pork or beef meatballs.
    Meatballs after 20 minutes in the oven. A bit of browning adds flavour. An yes, OK, they did stick to the foil a bit.

    Once the meatballs are cooked, transfer them into the pan with the sauce. This is why you need a big saucepan and I never made the mistake of using a small saucepan. Oh no, siree, matey Bob!

    About a dozen meatballs and a tomato sauce in a pan.
    Meatballs in tomato sauce, ready to dish up.

    Garlic bread goes well with this.

    1. Chicken thigh are tastier than breast, but not as aesthetically pleasing. ↩︎
    2. I think I got this tip from Gordon Ramsey. The salt breaks down some of the protein in the meat and helps the mixture bind by creating a natural glue. ↩︎
Verified by MonsterInsights